RBAC
⚡ 5 min readRole-Based Access Control for workspace members, resources (permission keys), and roles. Use the Console to define resource keys before passing the same strings to SDK methods such as openAuthIdpModal.
What the RBAC Panel Does
The RBAC panel provides a modal dashboard with three tabs:
- Members Tab - Registered-member management with add, delete, role assignment, sorting, and pagination
- Resources Tab - Create and edit resource keys that power
{resource}:{action}permissions and SDKresourcestrings - Roles Tab - Role lifecycle plus the permission matrix (per resource × CRUD / step-up)
The RBAC panel opens as a floating modal window in the center of the screen, similar to Audit Logs
Prerequisites
- Active Transcodes project
Opening the RBAC Panel
Log in to Transcodes Console
Go to Transcodes Console and sign in with your account
Open your project
From the dashboard, select the project you want to manage. You’ll see the project overview page
Find the Authentication Kit Cluster
On the project page, look for the Authentication Kit Cluster section. This is typically located in the main content area of the dashboard
The cluster contains several cards/tiles including:
- Installation Guide
- Configuration
- Branding
- Audit Logs
- RBAC
- Backup
- JSON Web Key
Click the RBAC node
In the Authentication Kit Cluster, locate the card with the label “RBAC”. Click on this card to open the RBAC modal

The RBAC modal opens in the center with three tabs: Members, Resources, and Roles
Members Tab
The Members tab lists every workspace member (end-user account in your project) with full management capabilities.
Some Console builds or screenshots may still show Users on tab labels and buttons (e.g. Add User, CREATE USER). In this guide we use Members because that is the Transcodes data model; the UI you see is the same surface.
The Members tab shows:
- Registered Members section header (may read “Registered Users” in the UI)
- + Add Member button (top-right) (may read + Add User)
- Member table with columns:
- Name
- Registered (sortable with ↓)
- Last Active (sortable with ↓)
- Role (dropdown selector)
- Member UID (monospace font, truncated) (may read “User UID”)
- Actions (delete button)
- Pagination controls (Page 1+, < >)
View Members
The member table displays up to 50 members per page with pagination controls at the bottom
Table columns:
| Column | Description |
|---|---|
| Member’s email address | |
| Name | Display name (may be auto-generated) |
| Registered | Account creation date (sortable) |
| Last Active | Last activity timestamp (sortable, default sort) |
| Role | Current role assignment (editable dropdown) |
| Member UID | Unique member identifier (monospace, truncated) |
| Actions | Delete button |
Sort Members
To sort the member table:
- Click any column header with a sort indicator (↓)
- Available sort fields:
- Registered (createdAt) - Sort by registration date
- Last Active (updatedAt) - Sort by last activity (default)
- Click again to reverse the sort order (asc ↔ desc)
- Table automatically resets to page 1 when sorting changes
Add Member
To add a new member:
- Click the + Add Member button (top-right) (or + Add User if shown)
- The Add New Member modal appears (titles may say “Add New User”)
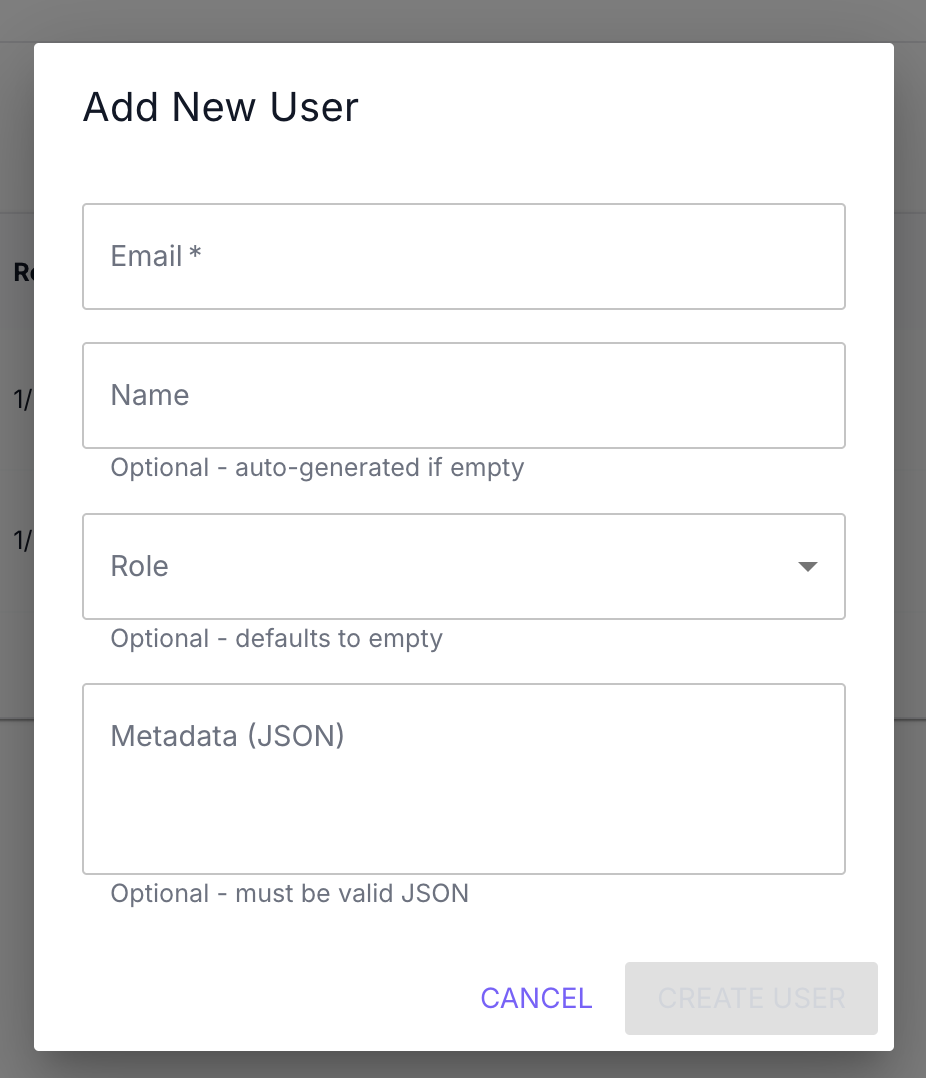
- Fill in the form fields:
| Field | Required | Description |
|---|---|---|
| Yes | Member’s email address (must be valid email format) | |
| Name | No | Display name (auto-generated if empty) |
| Role | No | Member’s role from the available roles dropdown (defaults to empty) |
| Metadata (JSON) | No | Custom metadata in valid JSON format |
- Click CREATE MEMBER (may read CREATE USER)
- The member appears in the table immediately
Metadata Validation: The Metadata field must be valid JSON. Invalid JSON will prevent form submission
Example metadata:
{
  "department": "engineering",
  "plan": "premium",
  "team": "backend"
}
Role assignment:
- Select a role from the dropdown (only shows existing roles)
- Leave empty to create a member without role assignment
- Role can be assigned or changed later from the table
Update Member Role
To change a member’s role:
- Find the member in the table
- Locate the Role column for that row
- Click the role dropdown
- Select a new role from the list:
user(built‑in role name, not “Users” vs “Members” wording)- Any custom roles you’ve created
- The role updates automatically
Role changes take effect immediately. The member’s inherited permissions reflect the new role assignment
Delete Member
To delete a member:
- Find the member in the table
- Click the delete button in the Actions column
- The delete confirmation modal appears (may read Delete User)
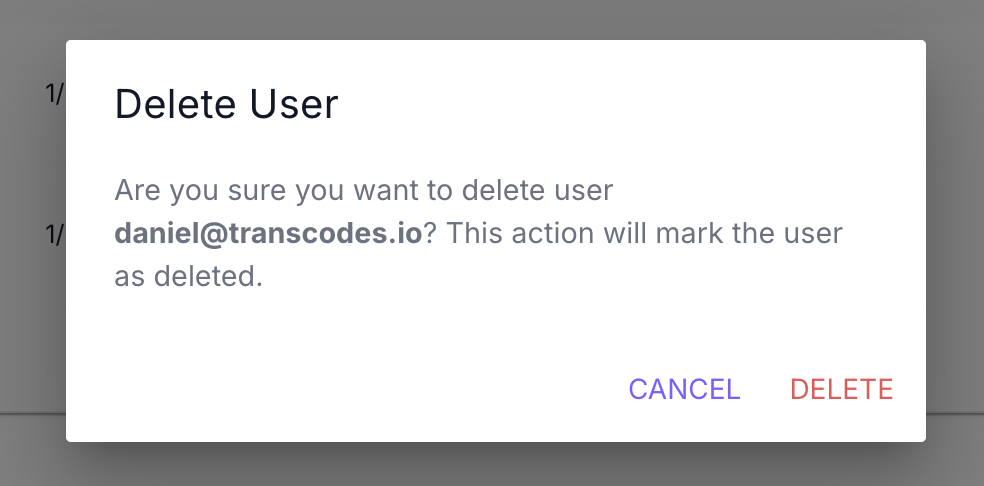
- Review the confirmation message showing the member’s email
- Click DELETE to confirm (or CANCEL to abort)
- The member is permanently removed immediately
Warning: This action permanently deletes the member. Their authentication credentials will be removed and they will no longer be able to sign in. This action cannot be undone
Resources Tab
The Resources tab is where every permission—and every SDK call that passes resource:—gets its canonical key from the Console. Strings such as 'documents' in openAuthIdpModal({ resource: 'documents', action: 'write' }) are not invented in code alone; they must exist here (unless you mirror them programmatically).
Resources are the unit of permission in Transcodes RBAC. Other systems often call these entries “permissions”—here a resource + action pair (e.g. documents:write) is the permission. Creating a resource is the same act as creating a permission scope: once it exists, roles can grant / deny / require step-up for each CRUD action on it. If you were expecting a separate “Permissions” tab, it lives inside each role’s permission matrix on top of the resource keys.
New projects typically start with only the built-in system resource. Add keys that match your product surface (documents, billing, members, …) before wiring the SDK—otherwise 'documents' in code will never line up with Console RBAC.
Why resources belong in the docs
Integration samples often demonstrate:
openAuthIdpModal({ resource: 'documents', action: 'write' });That documents value is resolved the same way in every environment:
- Console → RBAC → Resources — define the resource key once.
- Console → RBAC → Roles — edit a role’s permission matrix so the desired role includes the correct resource + action tier (Allow / Deny / Allow + step-up—see § Assigning Permissions to Roles).
- App / SDK — pass the identical
resourceandactionstrings.
If you omit step 1, you end up configuring roles against resource keys nobody has created yet—easiest unblock is visiting the Resources tab early (or using MCP automation below).
View Resources
Expect a compact table analogous to Roles:
| Area | Typical contents |
|---|---|
| Header | “Resources” (or equivalent) plus + Add Resource |
| Table | Rows for each resource key, display name, description, created/updated timestamps |
| Actions | Edit (metadata) · Delete / retire flows as enforced by Console |
Exact labels may ship ahead of screenshots; when in doubt, copy resource keys verbatim into your SDK integration.
Add Resource
To register a new resource key:
- Open the RBAC modal and switch to Resources.
- Click Add Resource (or +) to launch the creation form.
- Fill in fields (names may vary slightly):
| Field | Required | Guidance |
|---|---|---|
| Key | Yes | Stable identifier (lowercase letters, digits, hyphen). Example keys: documents, billing, members. Matches resource: in SDK & audit logs |
| Name | Yes | Human-readable title shown in Console |
| Description | No | Helps admins remember scope—especially important when many keys exist |
- Submit (e.g., CREATE) and confirm it appears in the table.
Resources are deliberately flexible—you model whatever domains your SaaS exposes. Prefer short, hyphenated ASCII keys (user-profiles > User Profiles API v2 slug).
Edit Resource
- Locate the row in the Resources tab.
- Use Edit to adjust display name or description.
- The resource key (
key) stays immutable in most deployments so existing JWT claims, SDK calls, and audit entries continue to validate.
Need to rename an entity dramatically? Prefer creating a replacement key plus a migration checklist rather than repurposing legacy keys silently.
Delete or Retire Resources
Deleting a resource is destructive for your permission grid—expect Console warnings and possible step-up confirmations. Mirrors the MCP tool retire_resource (management token + verified session). Ensure no role still relies on obsolete keys before removal.
Programmatic Alternative: MCP create_resource
Administrative tooling for resources/roles rides the Transcodes MCP server—not modal SDK methods. Typical workflow:
MAT (management access token)
  → MCP client/agent
     → Transcodes MCP tool "create_resource" { key, name, description }
Immediately follow with set_role_permissions (often Verified Action requiring step-up MFA) so new keys are more than placeholders. Bulk migrations should follow upstream guidance in llms.txt: create_resource → create_role → matrix updates → membership creation ordering matters.
Console remains the quickest path when you spin up demos without agents.
Roles Tab
The Roles tab allows you to create, edit, and delete custom roles for your application
The Roles tab shows:
- Role Management section header
- + Add Role button (top-right)
- Role table with columns:
- Name
- Description
- Created At
- Updated At
- Actions (Edit button, Delete button)
View Roles
The role table displays all custom roles created for your project
Table columns:
| Column | Description |
|---|---|
| Name | Role identifier (unique, cannot be changed after creation) |
| Description | Role description (optional, editable) |
| Created At | Role creation date |
| Updated At | Last modification date |
| Actions | Edit button and Delete button |
Add Role
To create a new role:
- Click the + Add Role button (top-right)
- The Add New Role modal appears
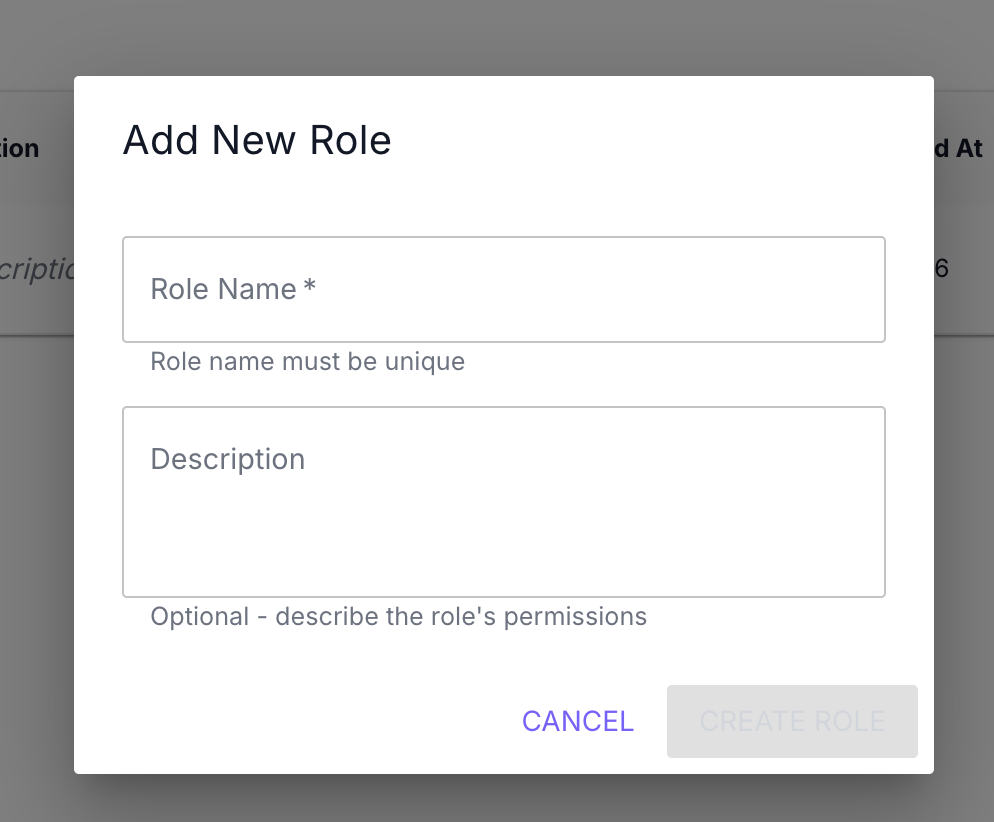
- Fill in the form fields:
| Field | Required | Description |
|---|---|---|
| Role Name | Yes | Unique role identifier (e.g., “admin”, “moderator”, “editor”) |
| Description | No | Optional description of the role’s permissions and purpose |
- Click CREATE ROLE
- The role appears in the table immediately
Role naming guidelines:
- Use lowercase letters, numbers, and underscores
- Examples:
admin,moderator,editor,viewer,guest - Role name must be unique within your project
- Role name cannot be changed after creation
Example role descriptions:
Full access to all features and settingsCan moderate content and manage membersRead-only access to contentEdit Role
To edit a role’s description:
-
Find the role in the table
-
Click the Edit button in the Actions column
-
The Edit Role modal appears
-
Update the Description field (Role Name is disabled and cannot be changed)
-
Click UPDATE ROLE
-
Changes are saved immediately
Note: Only the role description can be edited. Role names are permanent and cannot be changed after creation
Delete Role
To delete a role:
-
Find the role in the table
-
Click the delete button in the Actions column
-
The Delete Role confirmation modal appears
-
Review the confirmation message
-
Click DELETE to confirm (or CANCEL to abort)
-
The role is removed immediately
Important: Roles that are already assigned to members cannot be deleted. You must first remove the role assignment from all members holding that role
Before deletion:
- Check the Members tab to see which rows still use that role
- Clear those assignments via the Members tab role dropdown
- Once no member has that role assigned, delete the role
3-Tier Permission Model
Beyond basic role assignment, Transcodes RBAC supports a 3-tier permission model that provides fine-grained access control:
Roles → Permissions → Resources| Tier | Description | Example |
|---|---|---|
| Role | A named bundle of {resource}:{action} grants attached to members | editor, admin, viewer |
| Permission | An allowed action on a resource | documents:write, users:read |
| Resource | The target entity being accessed (defined in Resources Tab) | documents, users, settings |
Resources are the permission catalog. A “permission” in Transcodes is just {resource}:{action}, so creating / editing / deleting a resource key on the Resources tab is literally how you create / edit / delete permissions. There is no separate “Permissions” admin screen—the permission matrix lives on each role.
Creating Permissions
Permissions are defined as {resource}:{action} pairs:
Common actions:
read- View resource datawrite- Create or update resourcesdelete- Remove resourcesmanage- Full control including settings
Example permissions:
documents:read
documents:write
documents:delete
users:read
users:manage
settings:manage
Assigning Permissions to Roles
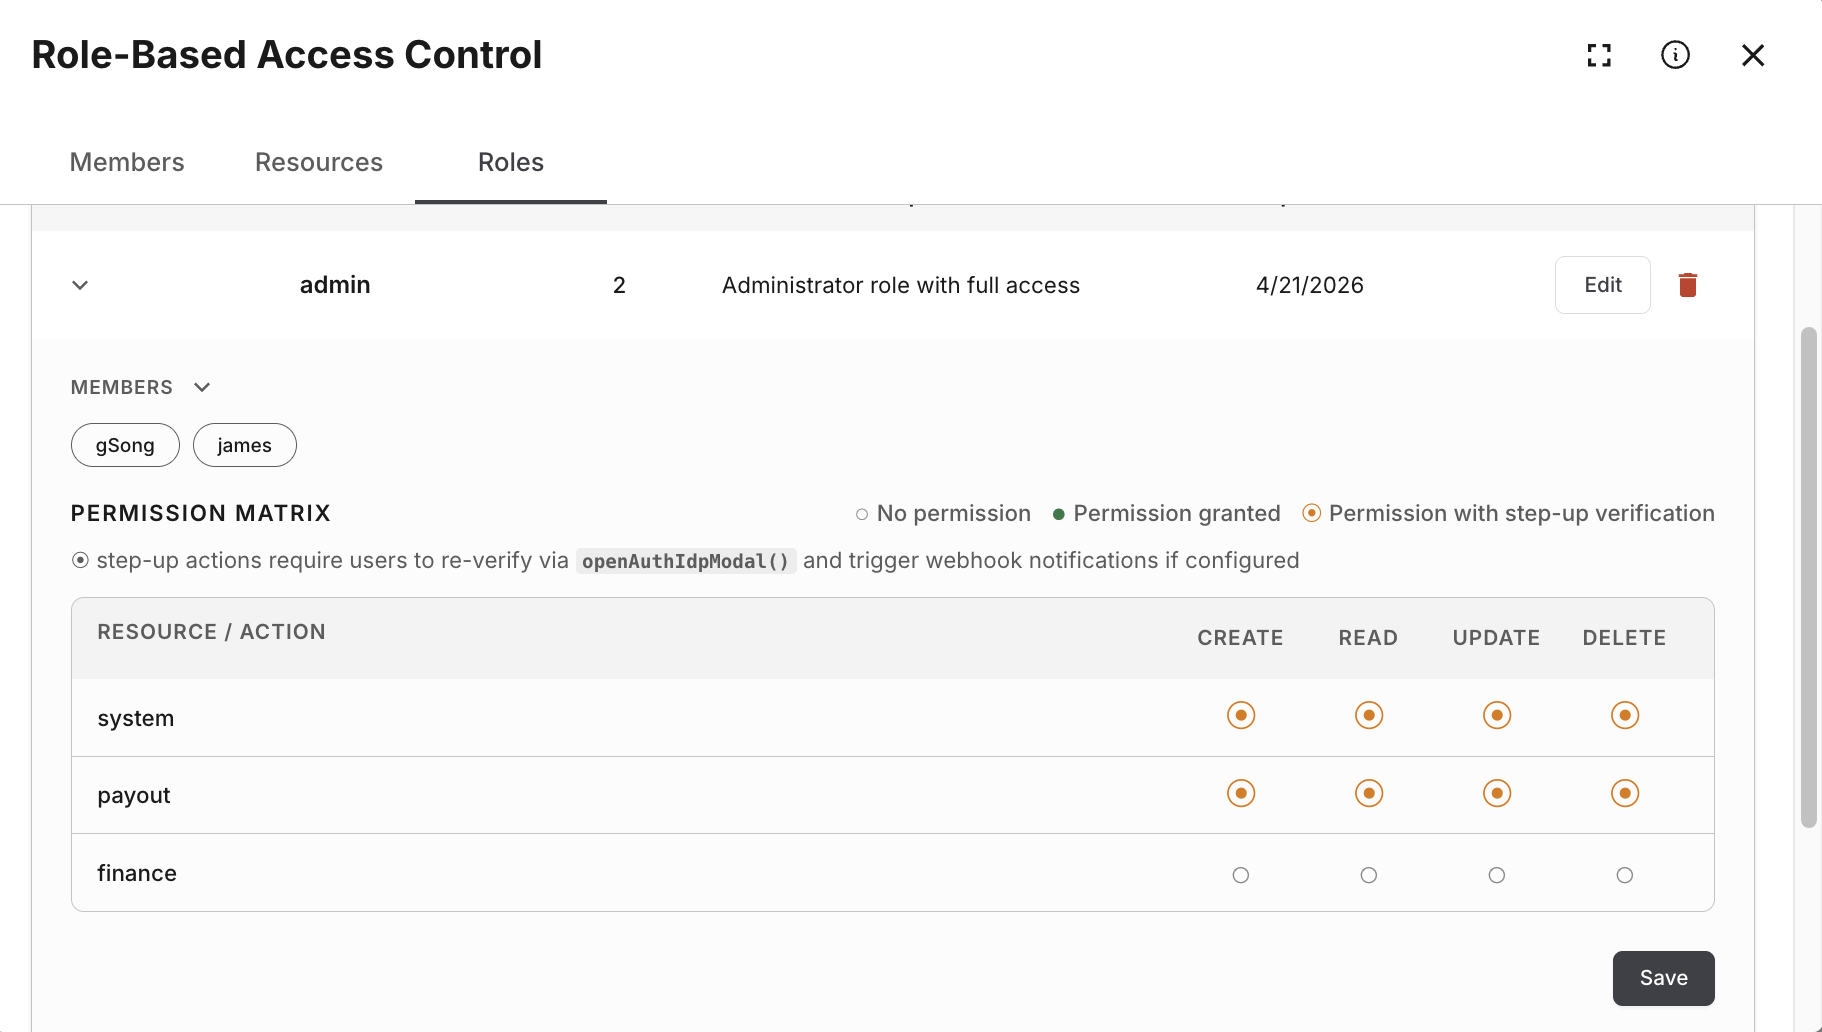
- Navigate to the Roles tab in the RBAC panel
- Click Edit on the role you want to configure
- In the permission matrix, set Allow / Deny / Allow requiring step‑up MFA per resource × action. Only resources you created in Resources Tab—plus built-ins such as
system—appear here meaningfully for new grants - Click UPDATE ROLE to save (may require verified step‑up MFA when changing sensitive matrices)
Each role can have multiple permissions. Members inherit permissions from their assigned role.
Resource Definitions (conceptual examples)
Concrete keys belong in Resources Tab. The pairs below illustrate how domain concepts map once those keys exist—you must register each key unless your project already seeded it:
| Resource key (example) | Typical domain slice |
|---|---|
documents | Content or file vaults |
users | Member profile operations (distinct concept from IAM project owners) |
settings | Tenant configuration surfaces |
billing | Invoices, plans, Stripe Customer Portal redirects |
SDK calls pass the literal key string—for example 'documents' and 'write' once that role allows the pairing in the Console matrix.
There is no hidden catalog apart from seeded defaults (system, future roadmap seeds): if it is absent from Resources, it should not appear in JWT checks or audits.
SDK Integration
resource and action must match keys and matrix rows from Resources Tab plus Roles. Use the Transcodes SDK modal parameters:
// Open the auth modal with resource/action context
openAuthIdpModal({
  resource: 'documents',
  action: 'write',
});
The SDK validates the authenticated member’s role matrix against the requested resource and action. If that grant is missing, the modal applies the denial path automatically.
For step-up authentication on sensitive resources, combine with Step-up Session:
// Require re-authentication for admin actions
openAuthIdpModal({
  resource: 'settings',
  action: 'manage',
  stepUp: true,
});
What to do next?
After managing members, resources, and roles:
- Track workspace activity with analytics charts
- Download backups for data retention (member-related exports)
- Configure authentication settings for your workspace members
- Review Member API for programmatic member management